Hey guys!
I've been doing some creating lately and it appears I have Disney fever! I recently bought eight and a half HOURS worth of Disney music and I'm also writing a Disney themed story. So here are the results of my condition and check out my other blog "A Case Of The Mouse" if you get a chance.
And of course, it's all available in the shoppe
Monday, March 31, 2008
Tuesday, March 25, 2008
Spring
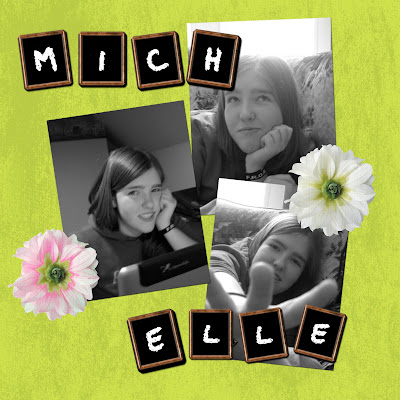
Yesterday: Birds sang, there was dry ground to be seen and I walked home at 5:00 in full sunlight. Spring was finally on its way. The today it began to snow. And it hasn't stopped. Huge flakes the size of feathers that in December would have been beautiful and had me humming "Winter Wonderland" instead had me searching desperately for the brightest most springy paper I could find. I settled on a beautiful green one, added flowers and butterflies and voila! A springy tribute to a great friend. Anything can be inspiration. I wish you all lots of April showers and May flowers and as always,
Happy Scrapping ♥
Happy Scrapping ♥
Tuesday Tutorial - Organizing
Today's tutorial is accutally something a little more practical rather than creative. I spent the long weekend organizing my supplies as I have so many now that I crash my computer if I try to open some of the folders.
What You'll Need:
Blank CD's/DVD's (preferably rewritable)
OR
Several USB keys
Your supplies
A burner
On your computer:
Happy Scrapping ♥
What You'll Need:
Blank CD's/DVD's (preferably rewritable)
OR
Several USB keys
Your supplies
A burner
On your computer:
- Set up a separate folder to keep your supplies, ideas and completed LO's in. I named my Scrapbook
- Within this folder set up 3 new folders Layouts, Supplies, and Zipped. I also have a folder called Miscellaneous where I keep copyright info, contact sheets and other misc. files related to my scrapbooking.
Layouts: This folder is where you will save all of your finished Layouts. Within this I also have a folder for inspiration (LO's by others for ideas and inspiration) and one called gallery thumbs where I put all the shrunk images for uploading to the Scrapgirls Gallery.
Supplies: This is where you will keep all your supplies. More on that later.
Zipped: Often when you download scrapbooking supplies or any kind of large file, it will come "zipped". All you need to get at the files inside is a program like Winzip. I use Just Unzip It. Whichever program you use you ought to be able to right click on your downloaded zipped file and click extract or unzip. This folder is where I keep all of those left over Zipped folders once I've extracted from them, just in case something goes wrong and I need to do it again. When zipped the files take up less space than unzipped so you can probably fit many in here. - In the Supplies folder you're going to want to divvy up your supplies to make them easier to find. I have mine separated into Alphabets, Brushes, Embellishments and Papers. You may also want an extra folder for Tools of Add-Ons if you gather enough of them. For now I just keep those things in the main Scrapbook folder as I don't have many yet.
Inside the Embellishments folder I have things further broken down (because I'm anal like that). So I have Frames and Tags; Ribbons and Edging; Buttons, Brads and Fasteners etc. - Some people organize their papers folder by colours or themes, but as many of mine are multi-coloured I find it easier to just leave them alphabetically.
Happy Scrapping ♥
Monday, March 17, 2008
What is it about women and shoes? Now Im not being stereotypical. I believe all (ok not every single on, but enough) women like shoes more than other articles of clothing. Whatever form they may be. Whether you're like my friend who loves running shoes and converse (are they running shoes?) or me with a small wardrobe of shoes in my locker so I don't have to wear Canadian Winter Proof boots all winter, us females have an attraction to shoes. I love looking at them, comparing them, shopping for them and wearing them. Have you ever spent more money on the shoes for an outfit than the rest? Do you have more awesome looking sneakers than warm weather days to wear them? Maybe not, but everyone has something. My favorite pair? The Orange ones pictured above. I got them for $7 at Suzy Shier and the only pair happened to be my size. I have yet to wear them out anywhere but I got them out when my friends came home for Christmas and everyone had fun trying them on.
Happy Scrapping ♥
Hey! A tutorial!
Look! Its a new tutorial! Woohoo!
[Monday] Tutorial: The "Poloroid Effect"
So today boys and girls we're gonna learn how to make your photo's look like old school photo's. Sound like fun? Well I thought so.
What You'll Need:
Photoshop
Picture(s)
Tools Used:
Square Marquee Tool
Fill Tool (paintbucket)
Allrighty then, pens and paper ready?
- Open a new image. Mines going to be 12x12 because thats what I use for scrapbooking. I'm also going to use a paper to so I can see what Im working on better.
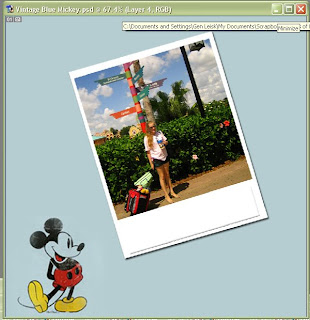
- Open the photo you want to work with and drag it onto your new document. I'm going to use the is picture from Coronado Springs resort in Disney World.
- I usually turn my photo so it's on a bit of an angle because it gives it a natural careless look that I think looks really good. You can do this by hovering over one of the photo's corners until you see a curved arrow with two heads. Once you see that you can click and drag your photo in the direction you want to turn it.
- Next go to your layers pallet and ctrl+click on your photo. This will produce a marquee around the photo, saving you a lot of trouble.
- Without deselecting, create a new layer (ctrl+n or file>new layer). This new layer should be the exact size and position of your photo.
- Now make click on the new layer in your layer pallet, but make sure you keep the original selected. Next get you fill tool (the paint bucket in your tools panel) and fill your selection with white (colour code ffffff).
- On the layers pallet drag the new layer down so it is listed below the original, this should put it underneath that layer.
- Now you need to drag the edges of your new white layer out to give your photo a border. Don't make it too wide, just a small one will do. It's not going to be perfect and will probably take some adjusting until you get a look that works for you.
- Now add a drop shadow and your photo is complete!
- you'll need to add a wider border at the bottom. Often this looks odd with longer or wide photo's, so if you want this look you may need to do some trimming like I did here. Ultimately you want your photo to be a little more square.
- Next add a smaller rectangle to the white space you now have at the base of your photo. Use a different colour while positioning it so you can see it better, you can change this later. Place the rectangle in the centre of the white space.
- Add a soft bevel layer>layer style>bevel emboss (Style: inner bevel; Technique: Smooth; Depth: 31; Direction: Up; Size:5)
- Fill this smaller rectangle in with white and add a drop shadow
Subscribe to:
Posts (Atom)