

Friday, November 30, 2007
Scraps-of-Me Shoppe
I'm working on getting my new shop up and running. Currently everything is still free and will reamin so for some time now. Don't worry, I will give ample warning if I decide to begin charging for any of my supplies (there will always be some freebies though). It's going to be called the Scraps-of-Me Shoppe and can be found here. It may take a bit for me to get it fully up and running, but theres some stuff up there right now including a really neat scotch tape emby that cause me a bit of trouble. keep checking back for updates and enjoy :D.
Tuesday, November 27, 2007
Glitterizing
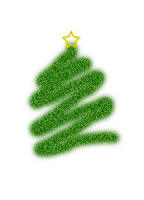
This weeks tutorial is rather short due to excessive homework. I'm going to demostrate how to make something look glittery, like with the Squiggly Tree's.
What you'll need:
Photoshop (I use 7.0)
Tools Used:
Custom Shape tool
noise filter
And we're off...
What you'll need:
Photoshop (I use 7.0)
Tools Used:
Custom Shape tool
noise filter
And we're off...
- Create a new transparent layer, with dimensions of your choice.
- Create a shape using the custom shape tool. right-click shape icon>custom shape>(shape of your choice). I used the Fleur de Lise shape and made it gold (#D5AB2C)

- Rasterize your new shape right-click layer>rasterize

- Add some noise filter>noise>add noise. You can adjust this to your liking, I used 22.3%, Gaussian. Make sure that the monochrome box is checked.

- All done! You can now add a drop shadow if you would like and do what you like with the finished product.


Friday, November 23, 2007
New Files
I've been busily making things (when I probably should have been doing school stuff, but ah well) and so here's a few. Let me know what you think please!
Squiggly Tree - Download Squiggly Tree.png (68kb)
Flourish Paper - Download Flourish copy.png (135.4KB) The words won't be there when it is downloaded.
Squiggly Tree - Download Squiggly Tree.png (68kb)

Flourish Paper - Download Flourish copy.png (135.4KB) The words won't be there when it is downloaded.

Tuesday, November 20, 2007
Tutorial: Dew Effect
This weeks tutorial is how to create a dew or water droplet for a picture. Water droplets are great for close ups of flowers and plants.
What you'll need:
Tools Used:
All set? OK, here we go:
What you'll need:
- Photoshop (I use version 7.0, but others are very similar too)
- A close-up photo of a plant, preferably a clear one.
Tools Used:
- Layers
- Eliptical Marquee
- Drop Shadows
- Filters
- Dodge Tool
- Gradient Tool
All set? OK, here we go:
- Open your image in Photoshop (I will be using this picture of a leaf from last spring) and save a COPY of it file>save as "(picture name) - dewdrop
- Use the Eliptical Marquee tool to create a circle. Make it whatever size you want your dewdrop to be, and don't worry, you can resize it later too.
- Keeping the cirlce selected make a new layer. This can be done by clicking the icon at the bottom of your "Layers Palette" (usually on the right of your work area) that looks like a page being turned. It's next to the trash can.
- Apply a "grey to white" gradient to this new layer (the circle) by first selecting the gradient tool from your sidebar (if you can't find it, right click the paintbucket and a smaller menu should pop out. It's there). Then click just above your circle and drag the line that appears down to just below the circle.
- Add a drop shadow. There are a couple of ways to do this. Layer>Layer Style>Drop Shadow or you can use the little f icon at the bottom of your Layers palette. You can fiddle around with the settings to make your shadow face where you want and be darker and such, but I set mine to: 13% Opacity, 5px Distance, 0% Spread and 5% Size.
- Use the Dodge tool to add a small point of reflection to your drop. The Dodge tool is located in your side bar (looks like a little pin). Just select it, then click the upper left quarter of your 'drop', make sure to leave space towards the edge though. You may need to do this a couple times to get the right look.
- If it is not already, add a marquee to your droplet by holding ctrl while selecting the layer from your layer palette. Add the filter Gaussian Blur. Filter>Blur>Gaussian Blur. Set the radius to 6
- Make sure you still have your marquee on the circle and select your original picture from the layers palette. This will give you a selection of the photo that is the exact size, shape and in the same place as your new dew drop. Now were going to warp that area so that it looks the way it might if you saw it trough a drop of water. Got to Filter>Distort>Spherize and set it to 100%.
- Your done! You can now move, resize and adjust your drop anyway you'd like. You can also make more droplets quickly by selecting that layer in your layers palette and pressing Ctrl and J together. This copies the layer. Copied layers are automatically named (original) copy, but you can rename them to avoid confusion by right clicking the layer in the palette and selecting properties.

Monday, November 19, 2007
Preview of Puffy Clouds
Quick Update before class.
Got a couple of my layouts up.
Uploaded part of my freshly-created "Puffy Clouds" pack. It's free and you can get it here:
Paper 1: Download Puffy Clouds - Kite copy.png (1MB)
Frame: Download Puffy Clouds - Frame copy.png (40.1 Kb)
Got a couple of my layouts up.
Uploaded part of my freshly-created "Puffy Clouds" pack. It's free and you can get it here:
Paper 1: Download Puffy Clouds - Kite copy.png (1MB)
Frame: Download Puffy Clouds - Frame copy.png (40.1 Kb)
Uploading LO's
OK, so I am now going to *attempt* to upload a whole whack-load of LO's before my class at two. We'll see how well this goes... *fingers crossed*
Welcome!
This is my brand-NEW blog, dedicated entirely to scrapbooking. I do both Traditional and Digital scrapbooking, but mostly Digital as it involves less mess and cost. I have been trying my hand at making some embellishments and papers myself, which I may put up here and if you like them, you can have 'em. Eventually, I would like to have my own store, but I have to get ALOT better first, and I have to make sire there is a demand.
Most of my LO's (layouts) will be put up here, but as many of them involve other people, some may not, it all depends on whether or not they want to be on the internet.
Thanks for reading, and I'll post again soon.
Most of my LO's (layouts) will be put up here, but as many of them involve other people, some may not, it all depends on whether or not they want to be on the internet.
Thanks for reading, and I'll post again soon.
Subscribe to:
Posts (Atom)