I hope you all had a great holiday and that you're still going strong with those resolutions LOL. As It is currently snowing crazily outside and I still have a half-hour until my first class of the day, I thought I'd make a post (though honestly I don't know what it'll be about). Maybe a tutorial? Now I just need a theme...hmmm...selective recolouring? Nope already did that. Oh! How about....
Grunge Look!
Now there are all kinds of products, actions and tips out there for how to do this, but I'm going to show you the easiest way, using nothing beyond what you already have.
What You'll Need
Photoshop
Photo (or other item you want to "grunge")
Tools Used
Brushes
OK, Hold on tight...

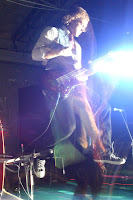
- Open your photo. I'm going to be using this picture I found on the internet of a band I like.
- Next you want to desaturate the image image>adjustments>desaturate or ctrl+shift+U.
- Open your brushes and select the brush called Dry Brush on Towel. You may need to load a different brush set to find it. This can be done by opening you Brushes Menu and clicking on the small triangle button on the top left. This should open a new menu - select Wet Media Brushes.

- I'm using plain white (ffffff), but you can use any neutral really depending on the look your going for. Using the colour you've selected "stamp" your brush along the edges and especially in the corners of your photo. The trick to to keep it from looking to uniform.
- If you wanted to, you could also add some tiny tears using the Polygonal Lasso. Just make a vaguely triangular shape starting from the edge of your photo and delete the area you have selected.


No comments:
Post a Comment